The time had come for the sibling Christmas gift exchange and this year, I picked my sister’s name out of the hat. For the past few years, I’ve been able to test out my DIY projects on the (lucky) recipients of my gifts – like a wooden six-pack and wine shelf. And this year, I couldn’t disappoint. Dan and I have had this project saved for a while, and now would be the perfect time to test it out. It’s similar to the wooden six-pack we built a few years ago for my brother, but instead of being a “to-go box” for beer, it was a “to-go box” for wine. Anyone that knows my sister also knows that it’s a perfect fit.
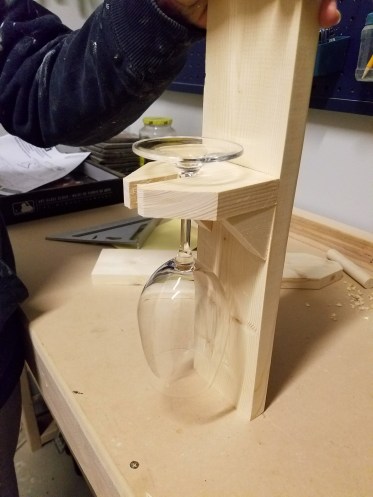
The concept is essentially a wooden caddy that could hold a bottle of wine and two glasses. While Dan and I debated on the design a bit (him insisting that Sarah would be better off with one glass and two bottles), we ultimately decided to stick with the original design.
I should (or maybe shouldn’t) mention that our family has a $30 limit for the gift exchange. What Sarah won’t find out until she reads this post is that I built this wine carrier for free… well, technically. You see, we have a garbage can and a second box full of wood trimmings from all the other projects we worked on in the past. So all I had to do was go shopping in there.


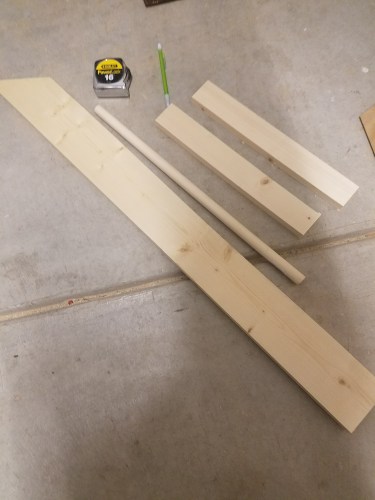
Lucky for me, I found everything I needed. Scrap pieces of:
- 1×4
- 1×2
- 3/4 dowel (rounded wood for handle)
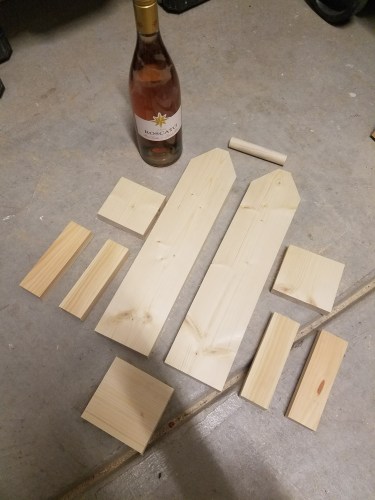
The original design for this came from this website , and they provided the cut list for each of the pieces. Here’s what I’d need:
1 – 1×4 @3 3/4″ (Bottom)
2 – 1×4 @ 15 1/2″ (Sides)
2 – 1×4 @3 1/2″ (Stem shelves)
4 – 1×2 @5 1/4″ (Slats)
1 – 3/4″ dowel @ 4 1/4″ (Handle)
About 10 minutes and a fun time with the miter saw later, I had all the pieces I’d need.
Now it was time for Dan to step in and show me the ropes a bit. Good thing he has about every and any kind of tool you would need on-hand. Although, he always insists that he needs more… hm…
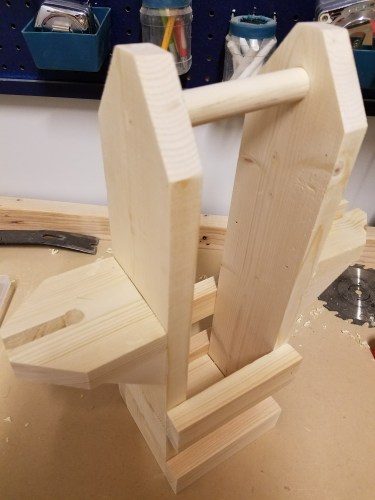
We had to drill holes on each of the side boards for the handle to sit in, which is what you see here.
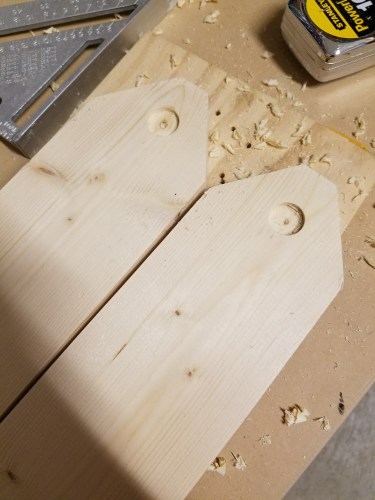
We then had to drill holes for the “stem shelves” themselves, allowing the wine glass to easily slide into place.


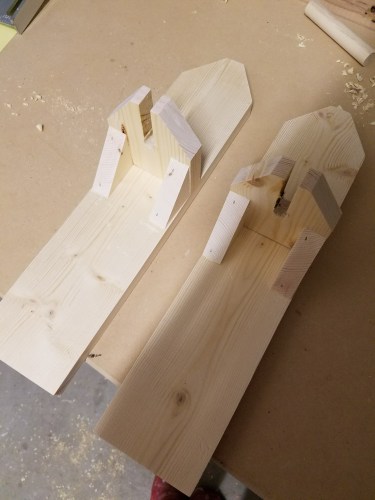
Dan added a bit of detail with the bottom moldings on each of the stem shelves, giving it added support and a more finished look.

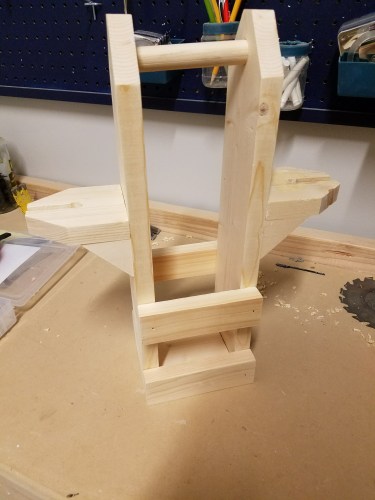
With the detail-cuts were made, we could now put the entire wine rack together. Wood glue, a few nails, and a couple clamps later, and this wine carrier was well on it’s way.

Now that it was completely assembled, it was time to decide on a stain color. While I notoriously lean toward Honey and Dan leans toward Dark Walnut, I decided to change things up a bit. I thought a merlot-looking Red Mahogany would be the perfect fit, since this was a wine caddy after all. Two layers of stain and three layers of poly later, all this wine carrier was missing was the glasses and wine itself.


But we can fix that.


After giving this gift to my sister, she whole-heartedly agreed with Dan’s initial design of one glass and two bottles. Guess she’ll have to wait until next year and I hope I pick her name out of the hat again.
