Every year, my siblings and I pick names out of a hat for our Christmas gift exchange. Its become a family tradition handed down from my dad and his siblings. Being that there are five of us all together, its also a bit of a relief that we have to shop for only one instead of four.
This year, my younger brother Jeff was lucky enough to be chosen by me (see what I did there). Being the cool, older sister, I wanted to get him something special. That’s when I remembered that Dan was talking about a new project that he eventually wanted to take on – homemade wooden beer caddies.
With only two weeks before Christmas, and about three other projects going on, I was surprised that Dan was completely on-board when I asked if we could squeeze it in. His only stipulation – we had to make one for him as well, and his had to be the first one done.
And so back to Home Depot we went. Our home away from home. There were a bunch of different cuts of wood needed – and luckily Dan had a good handle on what those were, because I was lost.

First thing’s first – all the cuts had to be made to put this jigsaw puzzle together. So on a frigid December day, in the middle of a Bills game nonetheless, we brought Dan’s dad’s miter saw outside and got to work. For the most part, it went smoothly. The biggest hang up was cutting the angles on the end pieces. We had the saw set for the correct angle, but for one reason or another, the sides weren’t matching up. Three hours (and a few frozen toes) later, and we had the cuts made. Now is the time when I should also admit that I snuck into the house a few times to warm up by the fire (and catch a few plays of the Bills game) while Dan continued to freeze outside. He’s such a trooper, isn’t he?
From here, Dan worked on his caddy, and I worked on mine. After hand sanding the pieces, we both took different approaches in staining/assembling. Using Minwax Honey, I stained all my pieces separately, and Dan helped to assemble it. We used wood glue and nails for added support. For Dan’s caddy, he partially assembled his into two sections, stained the sections, and then fully assembled. After it was all said and done, we decided that his method works better (queue the eye-roll).
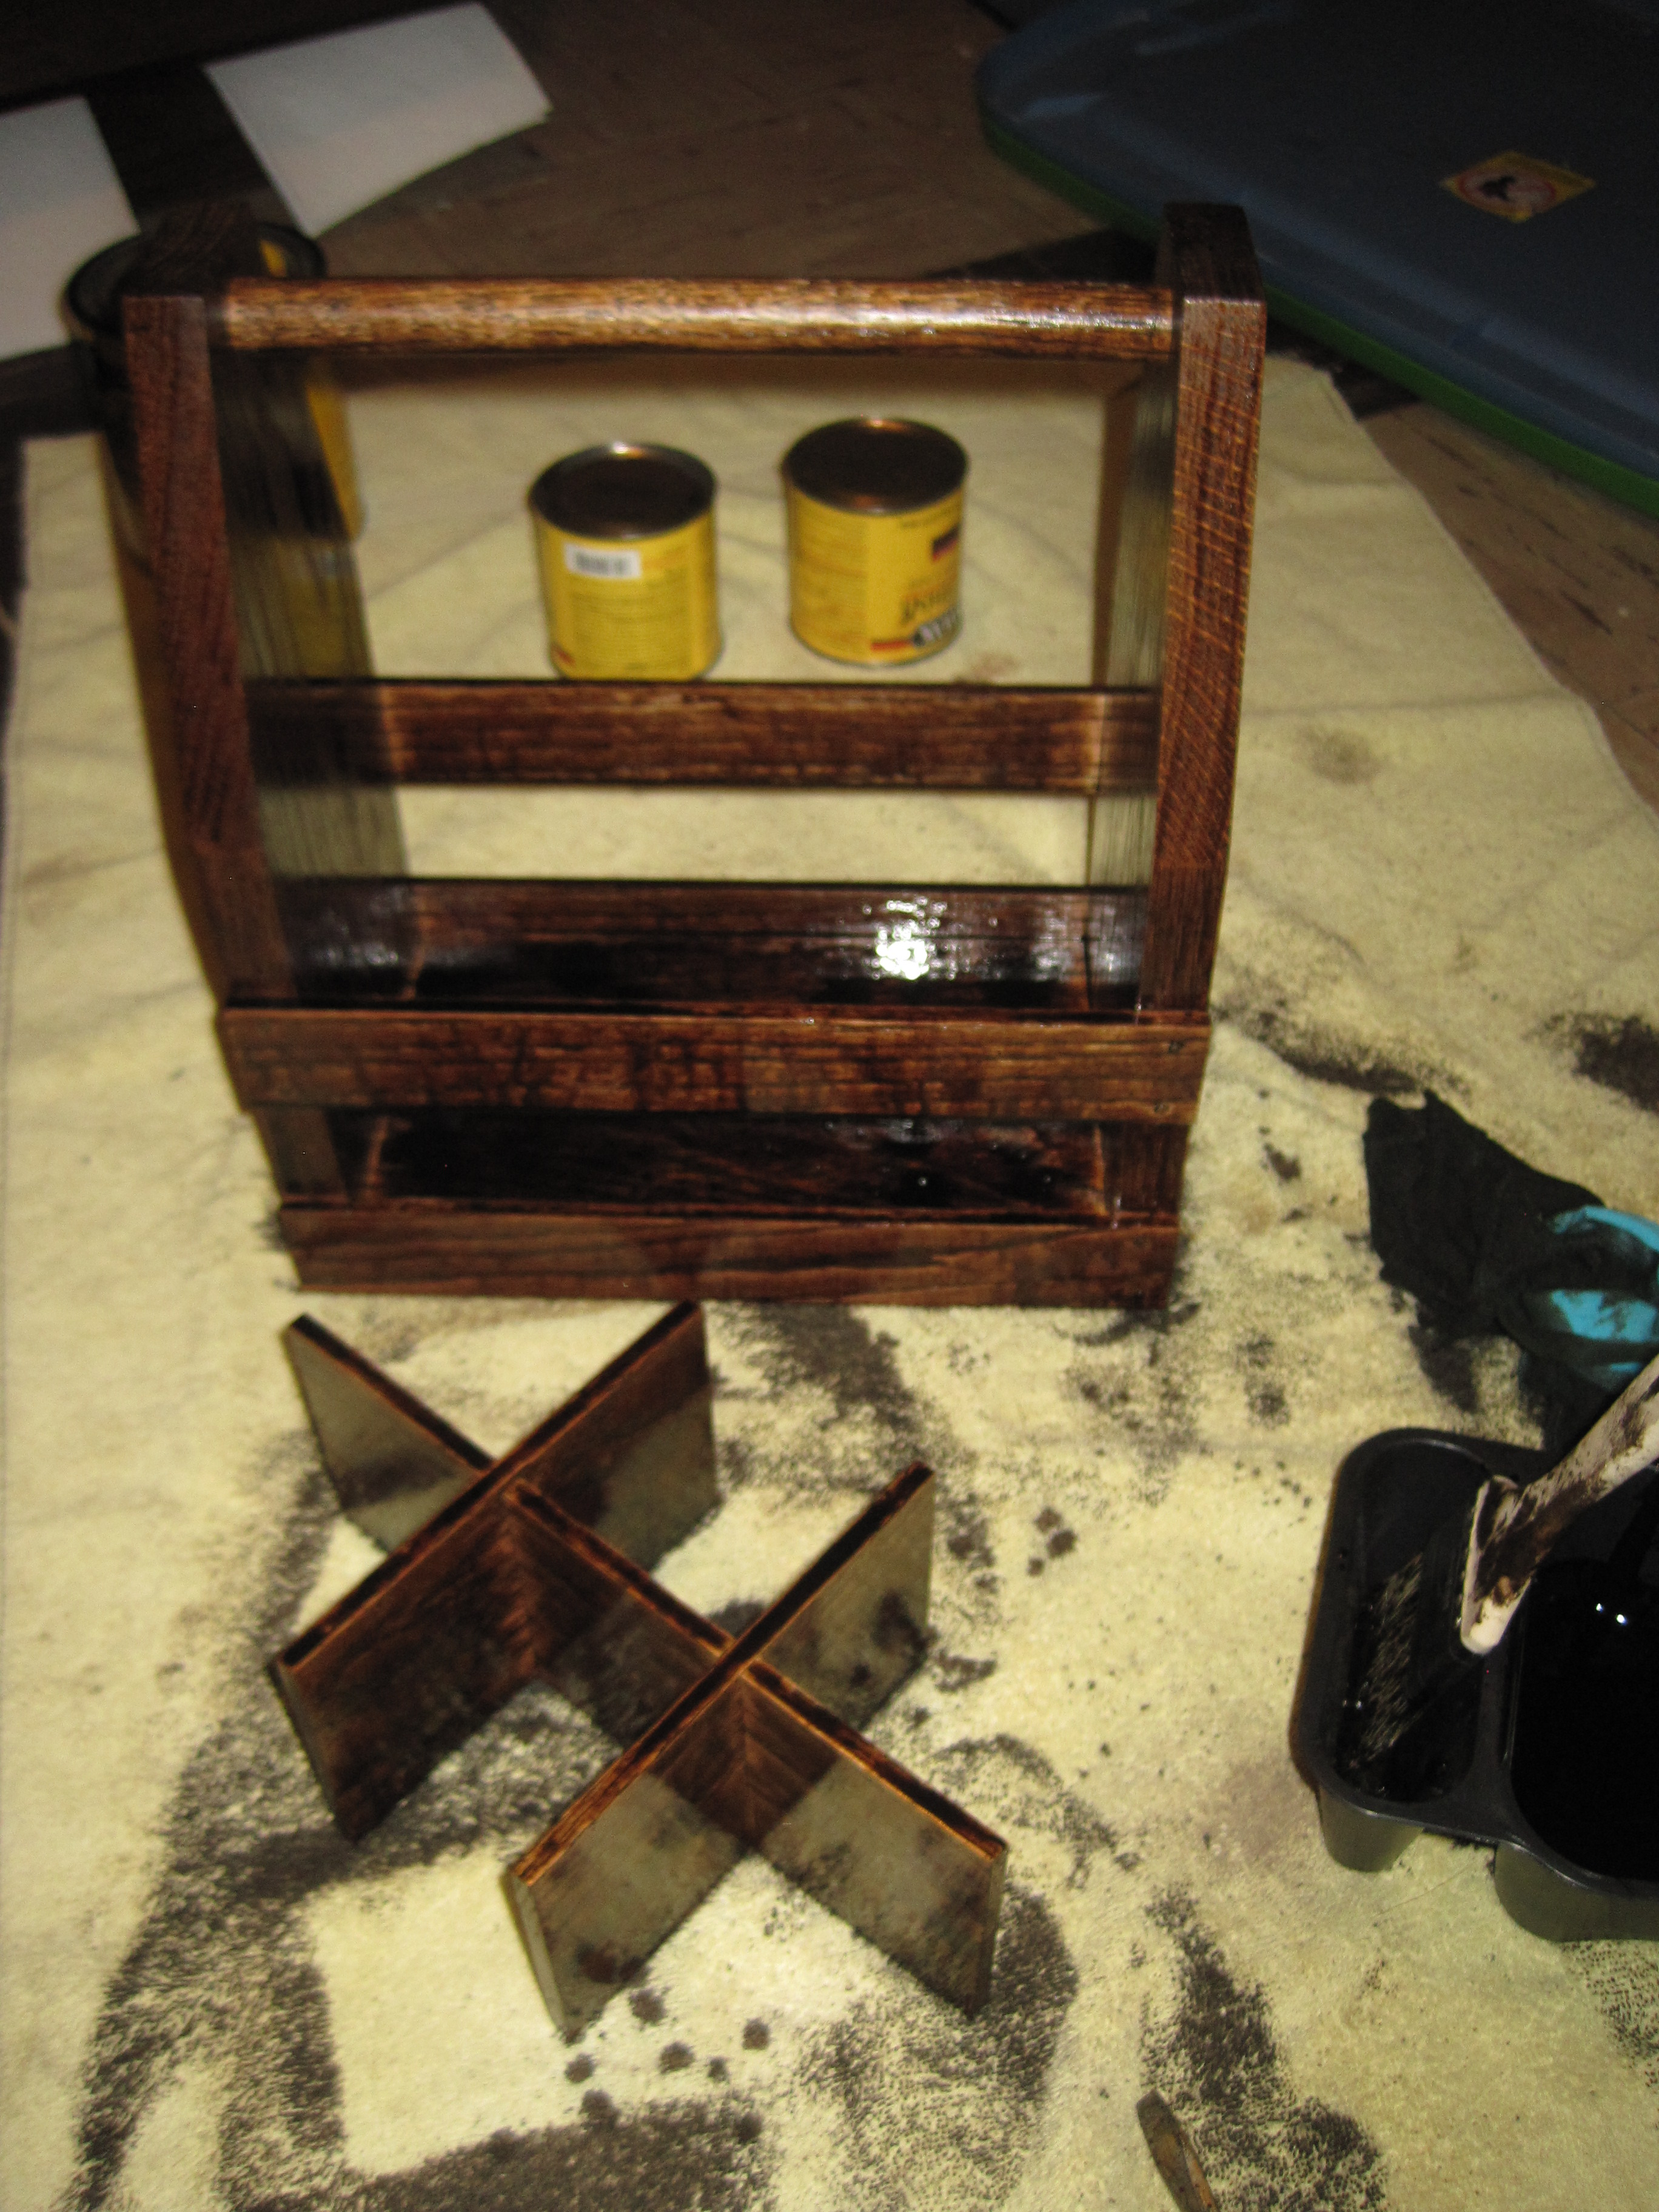
Once both were assembled, we used a wood burner to add Dan’s family brand to the bottom. We just started using the wood burner, and after practicing on some scrap wood, I’m finally getting the hang of it. Along with the brand, we also added a “serial number” (Another stipulation for doing this project on such short notice was that Dan’s had to have the number “01” while Jeff’s had “02”). The intent is that we’ll make more as gifts or to sell, adding numbers to each along the way.
Once the brand was etched in stone (or, wood, for that matter), we finished both caddies off with a satin poly.
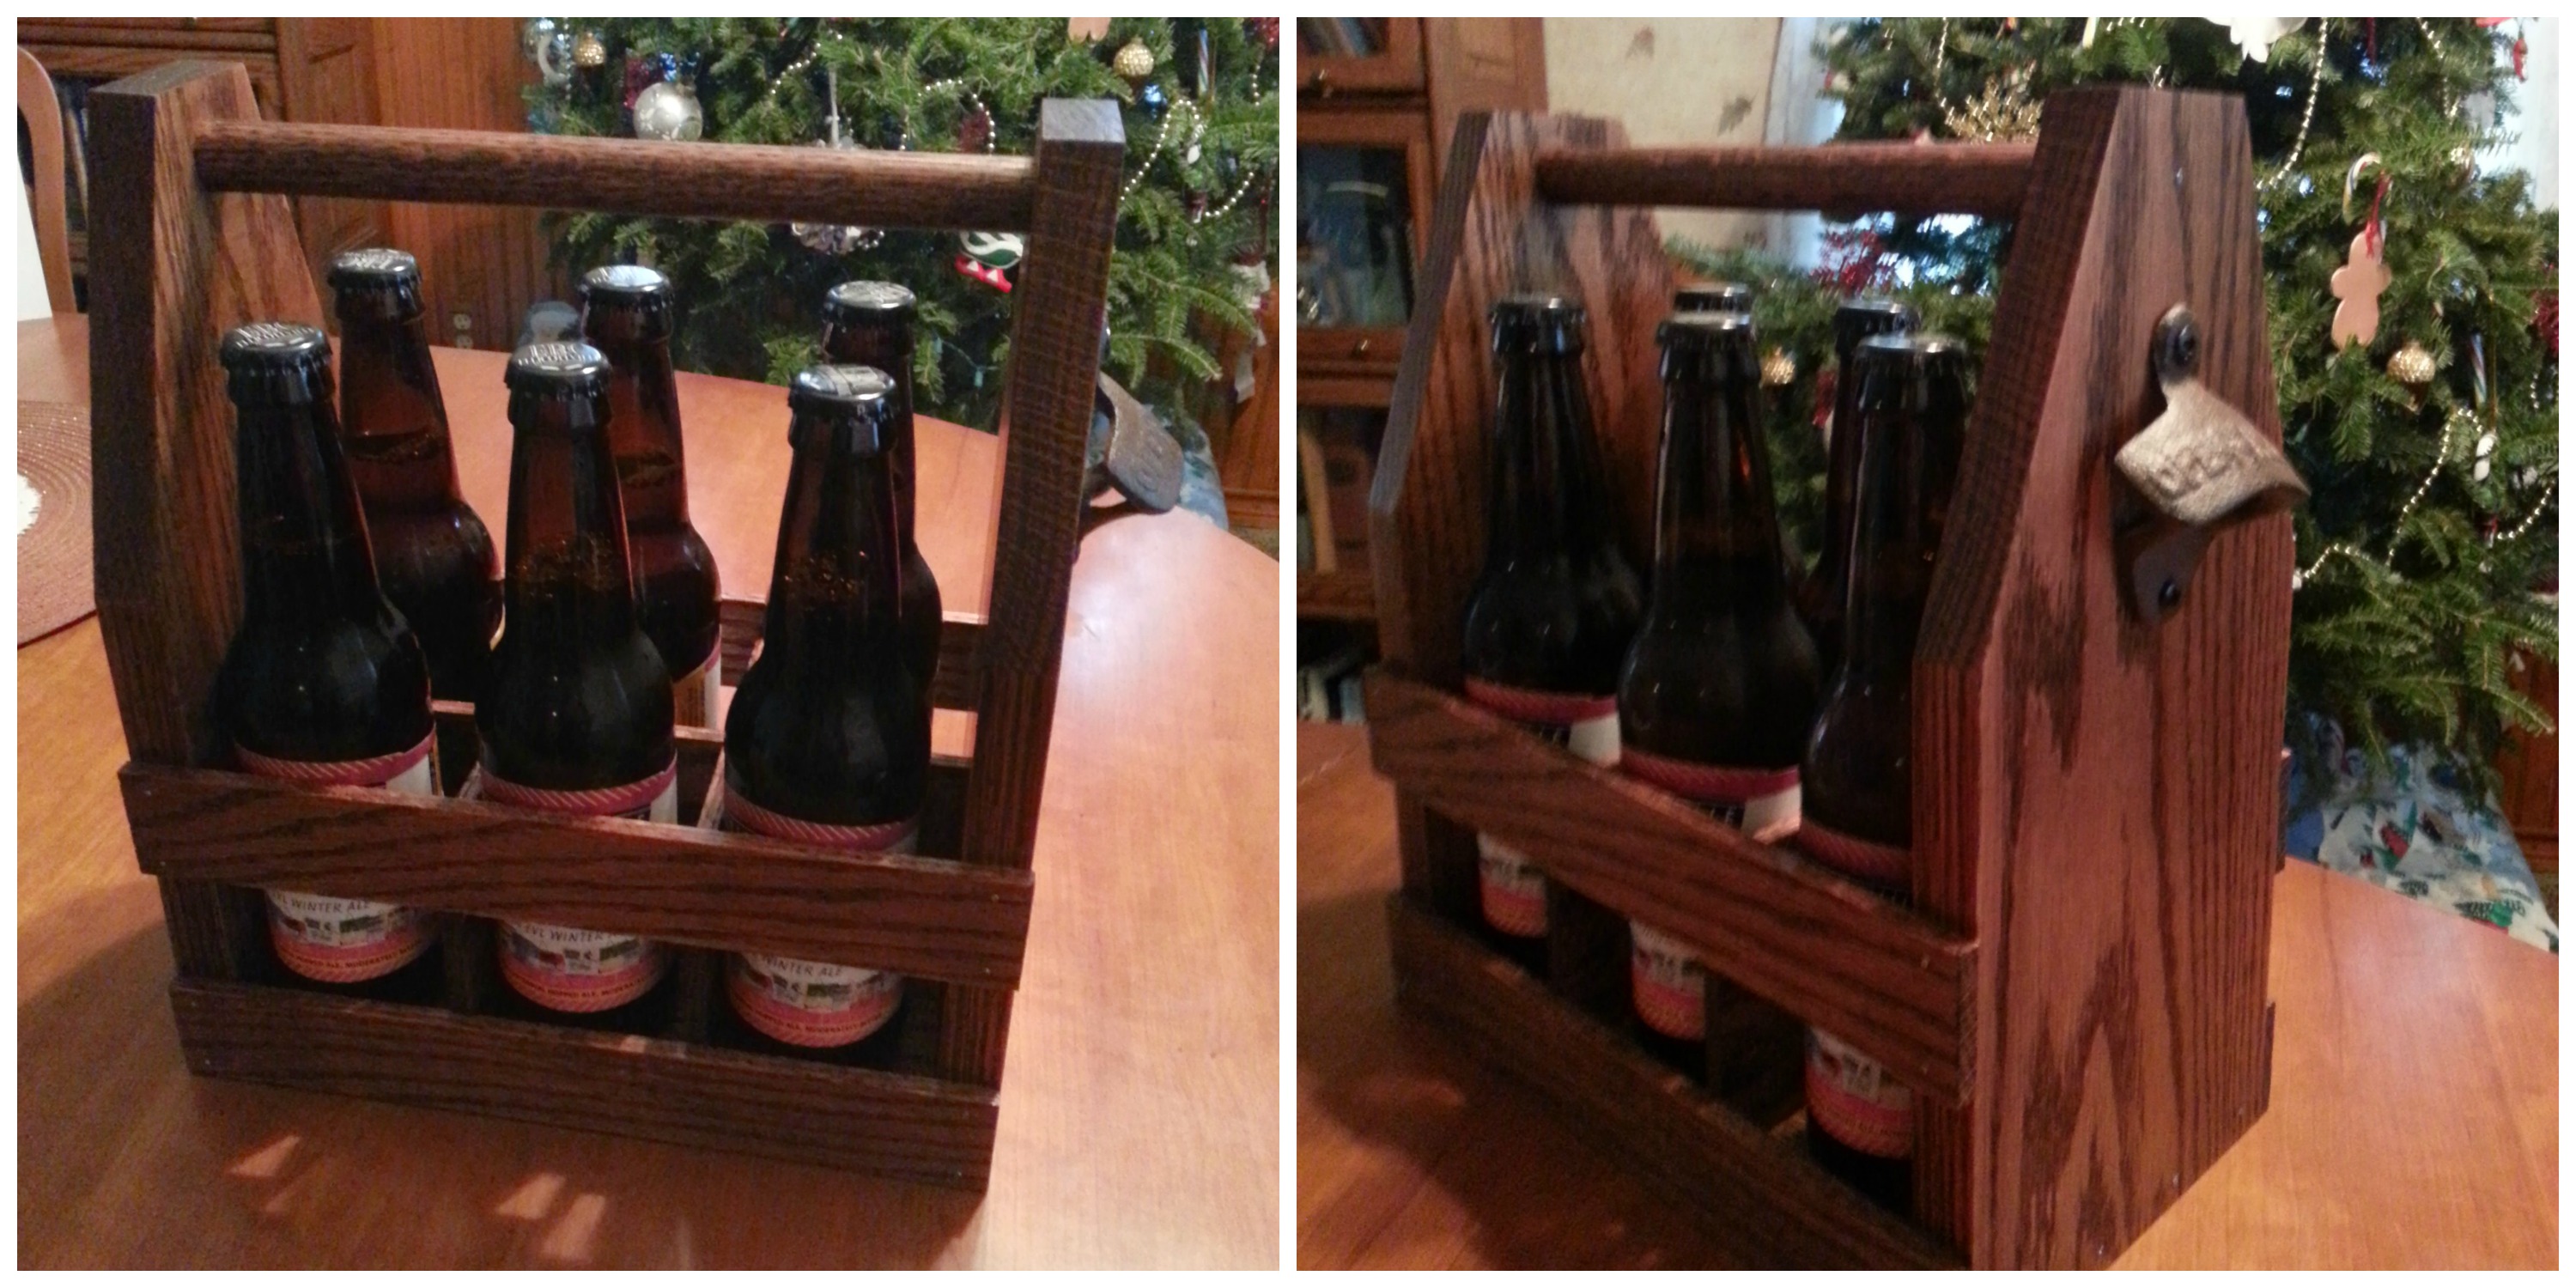
The final touch really completes these caddies, and makes them fun too. Bottle openers! Dan went with a black, wall-mounted opener, while I went with a rusted-brown version. Both turned out great, and added their own personal touch to the caddies. Dan also opted to add string to his handle at the top, giving his a unique look.
And presto! Two beer caddies complete in record time.
Because this was a gift for my brother, the caddy would not have been complete without a six pack included. My brother was going on a ski trip shortly after Christmas, so I thought it was only appropriate to fill the caddy with a six pack of Ellicottville Brewing Company’s Ski Bum Winter Ale.
It was fun to watch my brother try to guess what the gift was before he opened it. I did have to scold him after he started shaking the gift to see what it was (leave it to him to try and break it before he even sees what it is!). But once he opened it, he was a pretty happy brother.

OMG, Katie & Dan, you are amazing…Your new house and project are made with love and hard work which make for a very good relationship…Good luck with everything. Love, Mom
LikeLike