Our summer Saturday mornings often take us through winding back roads that lead to the nearby village of East Aurora. And while Dan sorts through wood at Niagara Lumber, you can find me sneaking across the parking lot to the Elm Street Bakery.
Every time Dan walks through their door of Niagara Lumber, he lights up like a kid in a candy shop. Not only do they have unique lumber, but they also have a workshop in the back that’s about twice the size of our house, and has just about every tool Dan could dream of. I swear, he’d live there if they’d let him.
The reason for our most recent Saturday morning drive was for walnut and white oak, two of Dan’s favorites. And while oak has become a staple of his projects recently, he’s been dying to add walnut to the mix.
Concept
This next project is one of those that Dan decided to breathe new life into. One of our first DIY projects in the house was this entryway bench.

A few years and a few DIY projects later, Dan is envisioning something new for this space. The evolution of this entryway bench mirrors the evolution of Dan’s creativity and carpentry skills (even if he won’t admit it). The first design was a pretty straightforward build. Pre-assembled legs attached to a reinforced wooden box that was then layered with foam padding and wrapped in fabric.
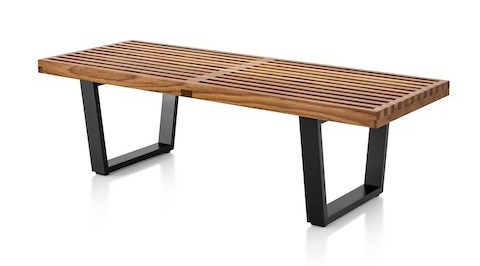
His design for the new entryway bench involves a hand-crafted, slatted-wood bench built using walnut for the top and sturdy white oak for the legs. His creative style has changed over time too, leaning heavily toward modern design (no matter how much I try to pull him back to traditional). This design in particular is called the Nelson Bench, a mid-century modern design that Dan was looking to replicate.
Making It
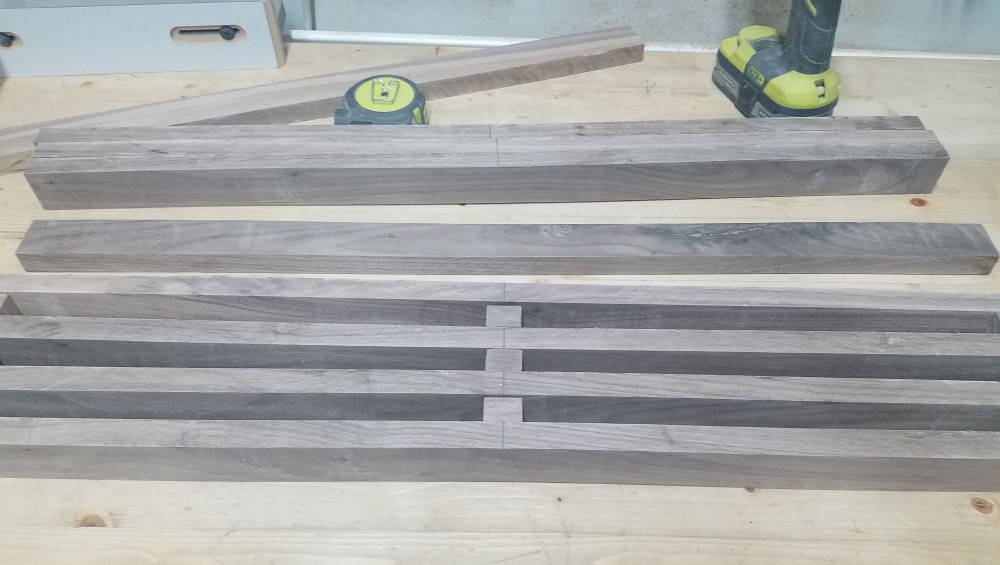
First up was building the slatted wood benchtop out of walnut wood. Starting with a 1x6x8 board, Dan used his table saw to cut down to small strips of walnut – 2 ft lengths that were about 1.5″ thick. He also cut small blocks of wood that would be used as spacers between the slats. The slats were then lined up in rows, and the spacers were added between each slat, at each of the ends and in the middle. To assemble, Dan used brad nails and wood glue on the inner pieces, and then just used wood glue and clamps for the outer pieces so that no nails would show.

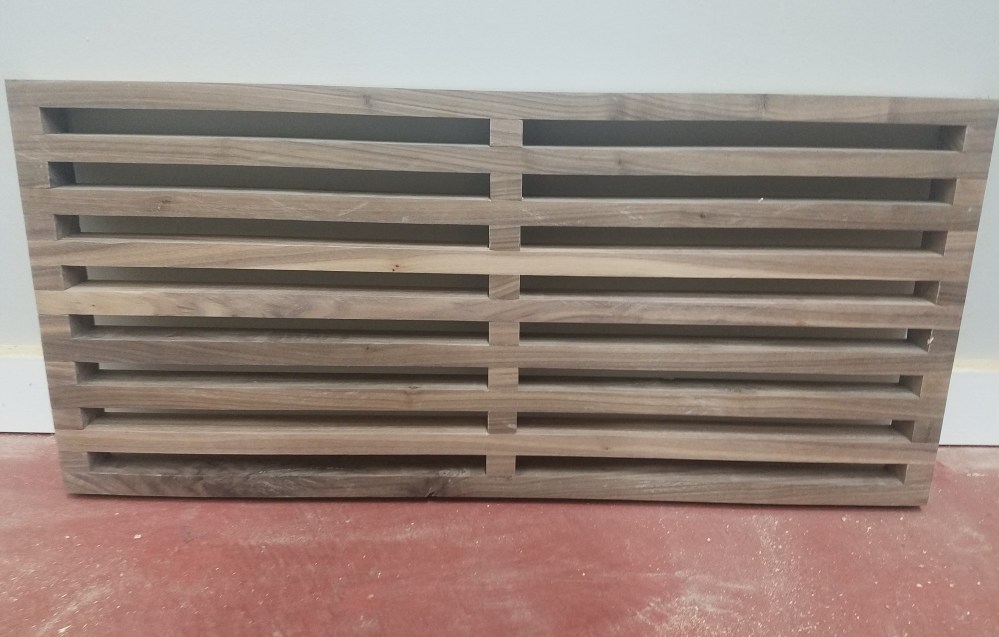
With the top built and assembled, Dan used a sander to even out the edges and give the benchtop a smooth, finished feel.

Next up was building the geometric legs, a staple design feature of the Nelson Bench. Each leg is built using clean, angled lines that form a trapezoid shape.
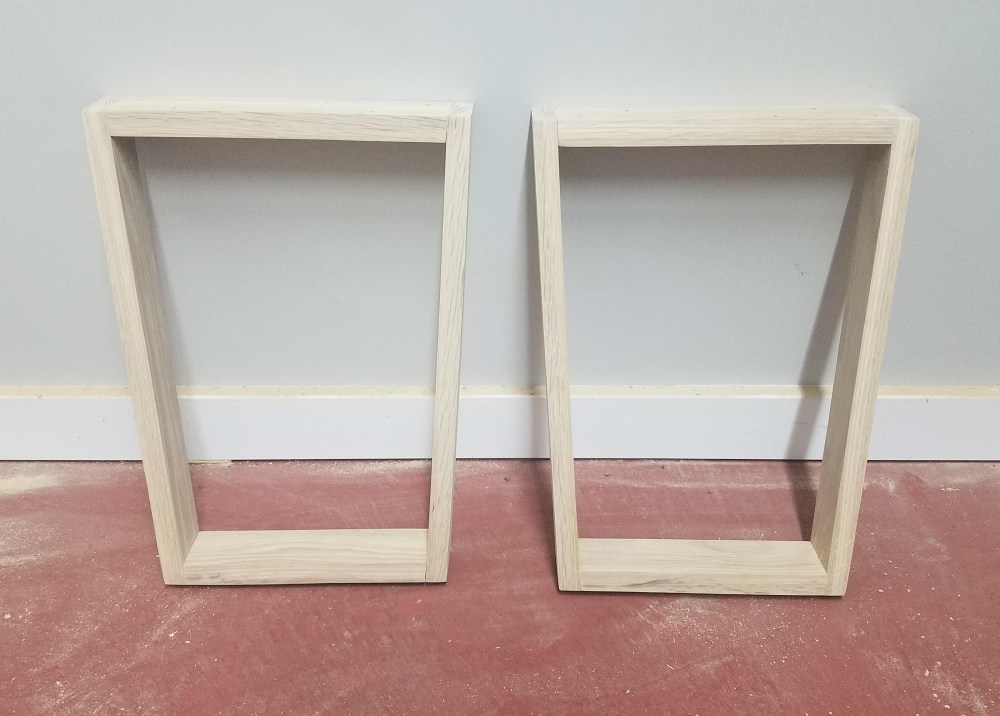
But the fun with angles and the trip back to geometry class doesn’t stop there. When attaching the legs to the base of the benchtop, they’re also installed at an angle, allowing both legs to form an ever-so-slight “V” angle.
Finishing It
With the benchtop and legs both built, Dan finished the walnut top off with semi-gloss poly, letting the natural wood shine through. For the white oak legs, Dan took a different approach and finished them using black ink followed by ebony stain. The black ink is super thin and absorbs right into the wood, allowing the natural grain lines that are a staple of oak wood to shine through.


And with that, the Nelson Bench is complete, and we have a new entryway bench to greet family and friends as they walk through the door.
