It’s been a busy month in terms of house projects and just life in general, which is why I’ve truly been slacking in keeping you guys up to date on everything. I should also mention that we helped Dan’s brother completely overhaul his new apartment, including paint, a mini-kitchen overhaul, and gutted and refinished the bathroom. More to come on that! But in the mean time…
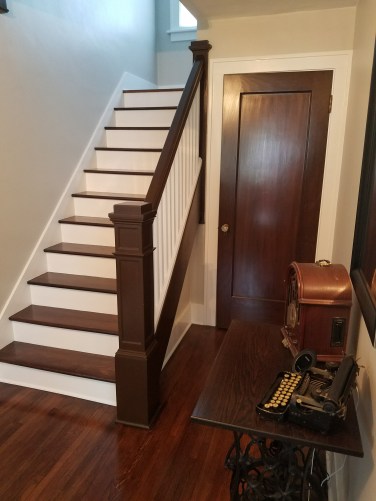
One of the projects we’ve been working on at our house is refinishing all the interior doors. Original doors that just needed a little TLC. If you look back at our post about refinishing our staircase, you’ll notice that the closet door on the right had yet to be completed.

So now it was time to finally update the door to match the rest of the stained woodwork in the house. This has been one of Dan’s ongoing “side” projects for a while now. Sanding down the door was the first step, and was no problem at all.
What took the most time was finding the right blend of stain to coordinate with not only the dark staircase, but the floors as well, which were more of a medium tone wood. Stains take differently depending on the type of wood, so it wasn’t as easy as using the same stain that was used in previous projects. After a few attempts, we finally settled on a Spiced Walnut stain by Rockler.
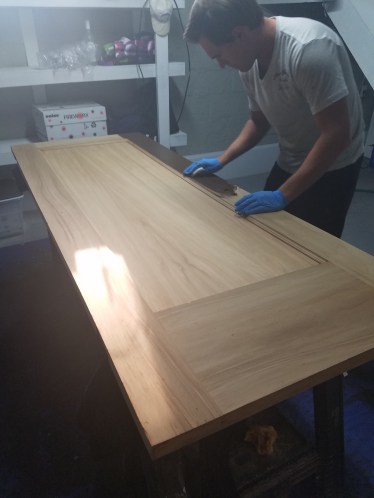
And of course, there’s always a few hiccups in our projects, so when the three layers of poly decided to attract dust (despite our best efforts at keeping the room we were working in as dust-free as possible), there was a bit of rework involved. But in the end, the door came out beautiful.
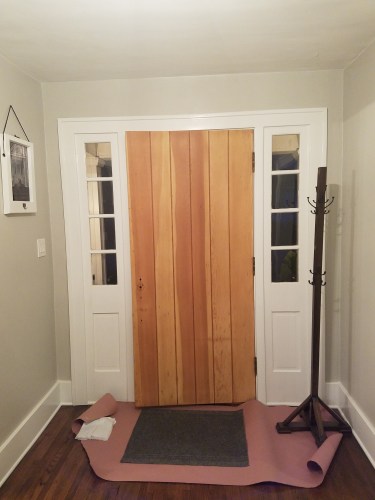
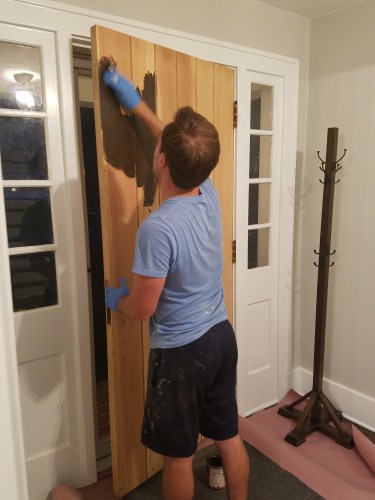
The second door we worked on was the front door. When we first bought the house, the outside of the door had multiple layers of chipping white paint on it, while the inside of the door was more of a cherry wood color (closer to what we were going for). Because the inside was in relatively good shape, we knew the door had potential tp be refinished in its entirety.

As a quick fix, we stripped and sanded the chipping white paint off the front, leaving the door as bare wood for the past 6 months.

And now that we’re revisiting and refinishing the doors, we also sanded down the inside too.
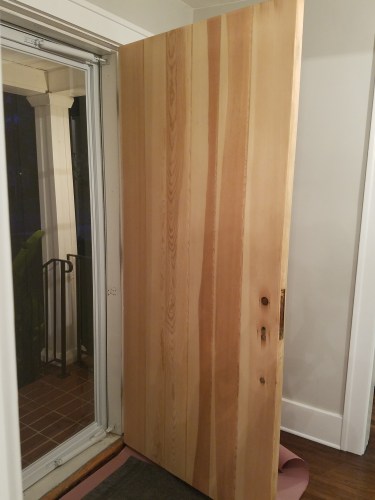
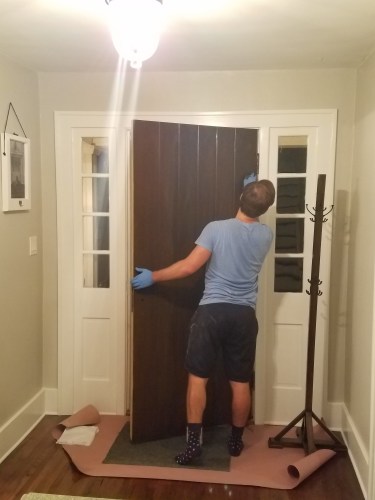
Because the wood is a bit different on this door, and we were going for more of a cherry finish, we started by testing more stain combinations. We finally decided on red mahogany for the outside of the door, giving us more of a cherry finish, and spiced walnut for the inside of the door, which better matches the darker wood finishes inside the actual house.
Dan’s always wanted a red door, but because there was no way we were going to paint a beautiful wood door, he settled on a mahogany finish and a red mailbox 🙂
And here’s how the front door turned out!
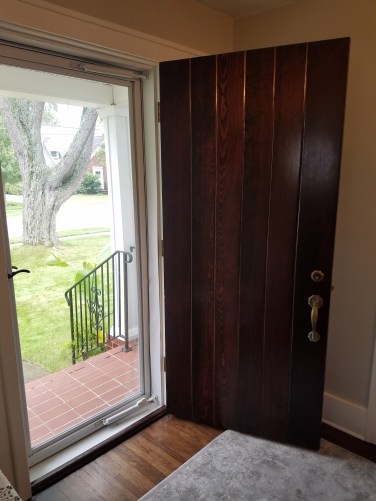


With the two doors in the center of the house completed, we can now check the foyer off as the first completely finished space in the house. More to come on the projects that brought this room together.

Your stairs are beautiful.
LikeLike